Guide to adding a shared mailbox
Please select the device you're using and follow the instructions to set up your shared mailbox.
-
Windows: Outlook (Classic)
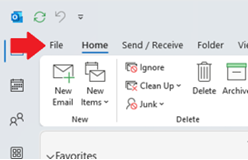
Step 1: In Outlook, select File from the ribbon.
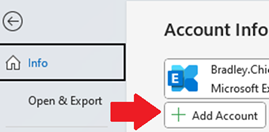
Step 2: Select the Add Account button.
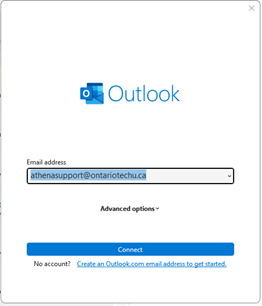
Step 3: Enter the shared mailbox that you wish to add and select the Connect button.
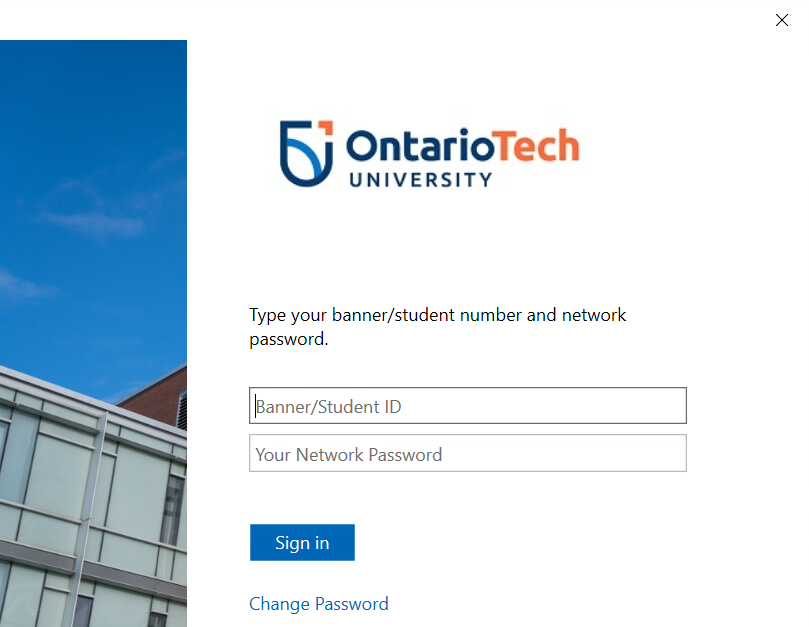
Step 4: Type in your username and password, and select Sign in.
Note: If your username and password doesn't work, please try your Banner ID and Network Password.
Step 5: Restart Outlook.
- Windows: Outlook (New)
-
Mac
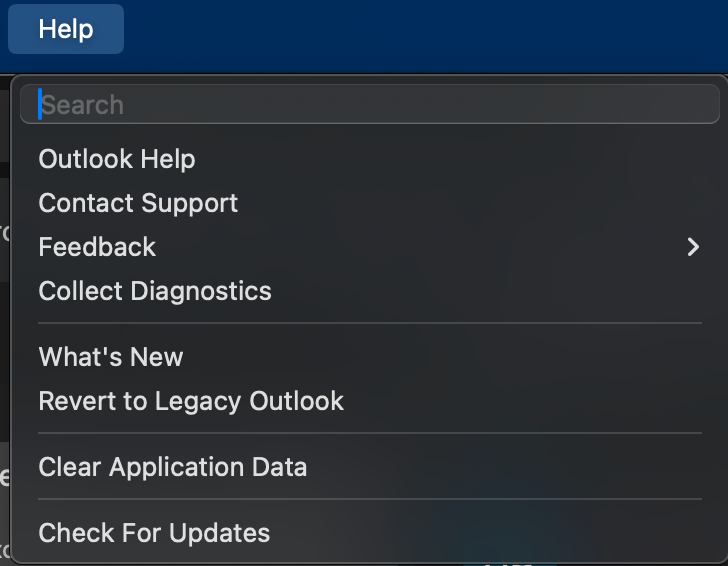
Step 1. Please ensure your Outlook is in Legacy Mode. If you aren't in Legacy Mode you can switch by selecting Help then Revert to Legacy Outlook.
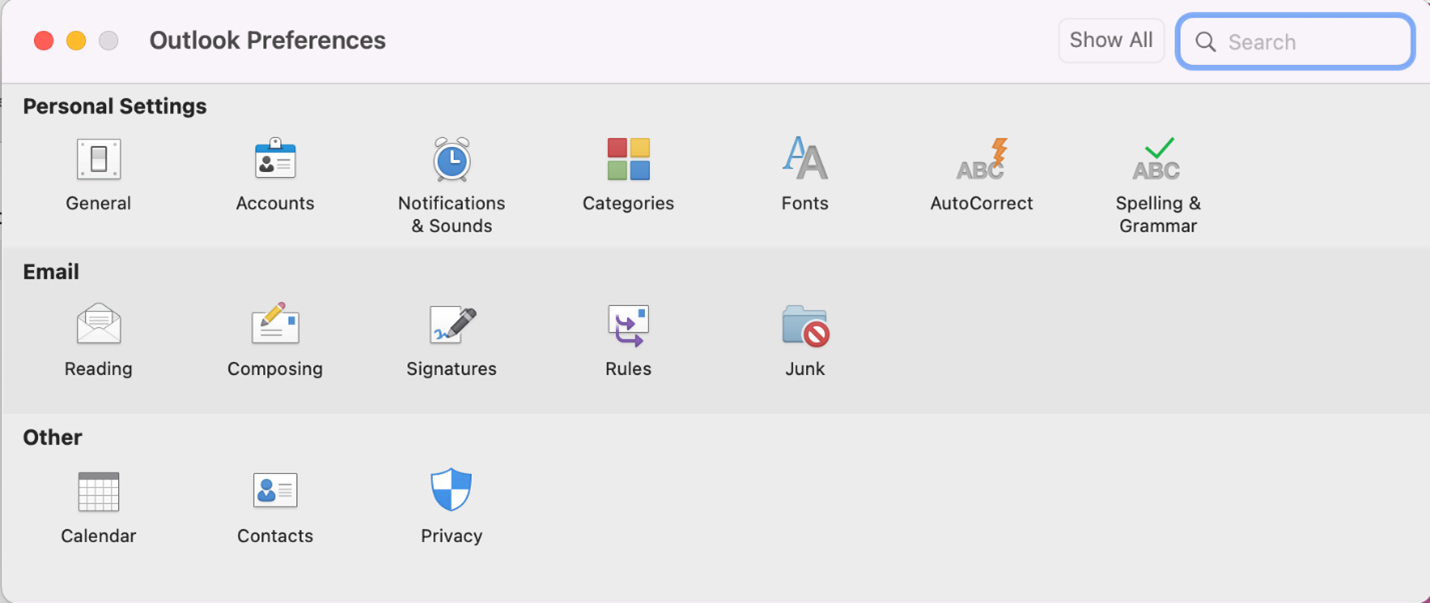
Step 2. From the menu bar select Outlook, followed by the Preferences/Settings.
Step 3. Select the Accounts icon.
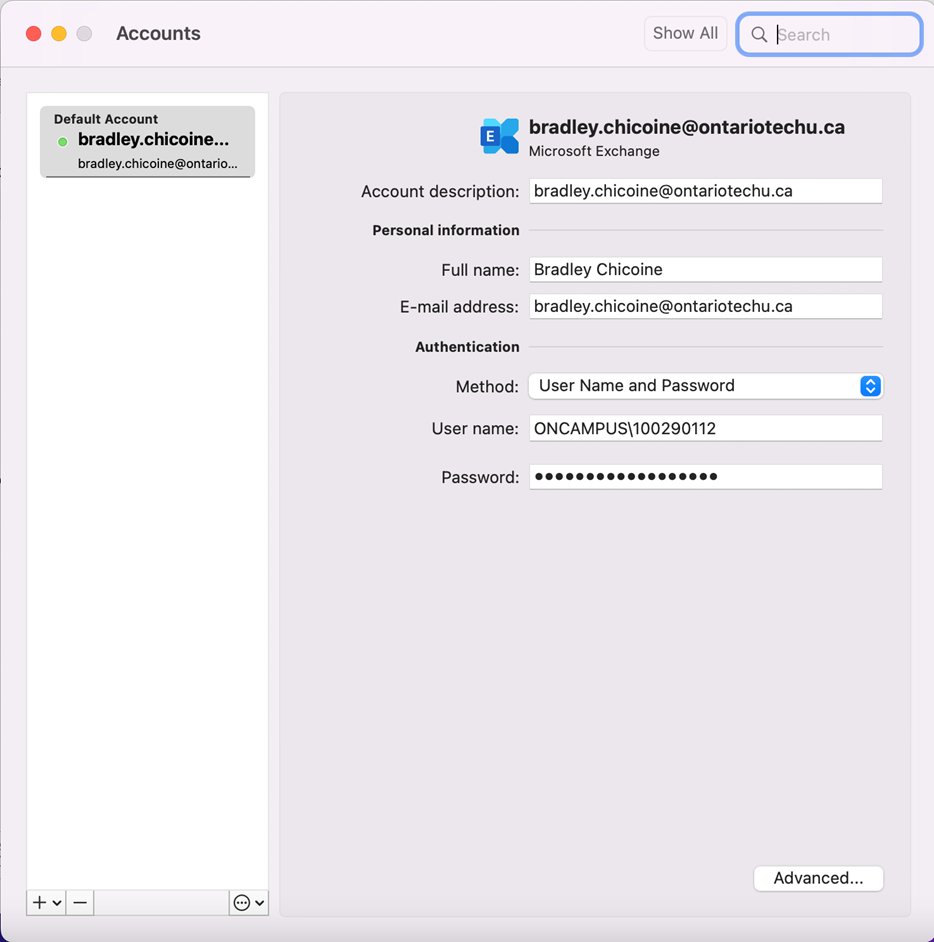
Step 4. Select the Advanced button, in the bottom right hand corner.
Step 5. Select the Delegates and under Open these additional mailboxes click the + button.
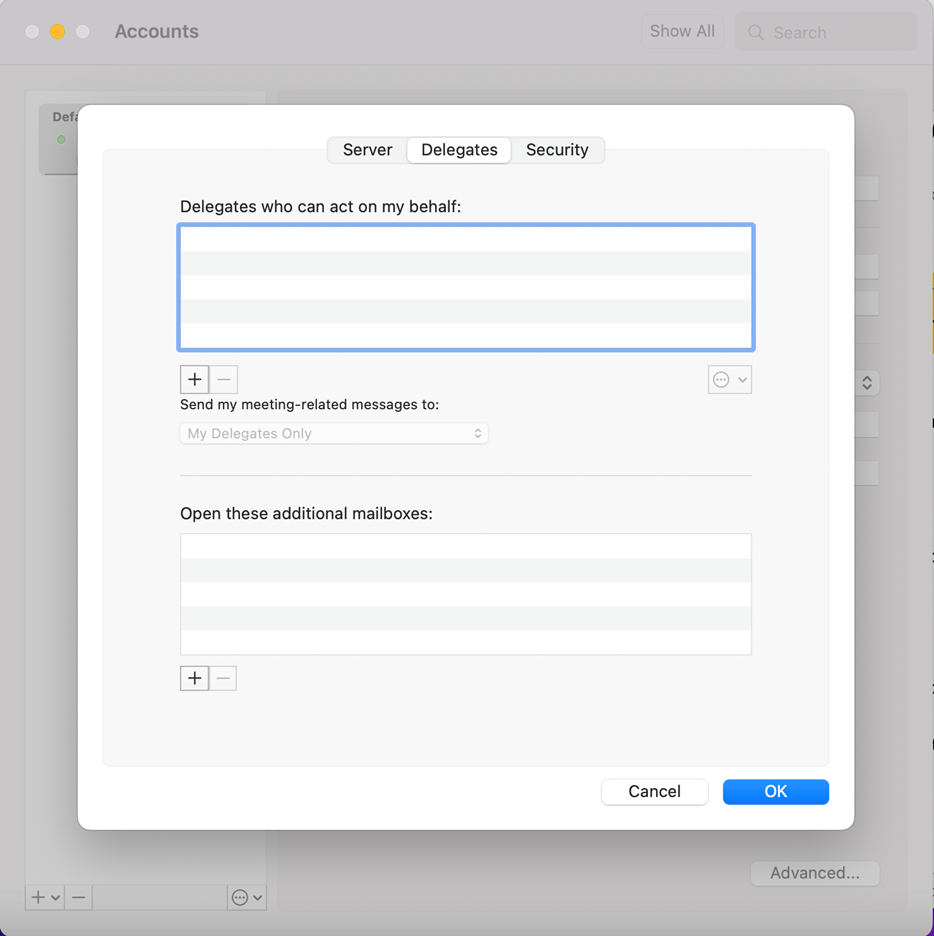
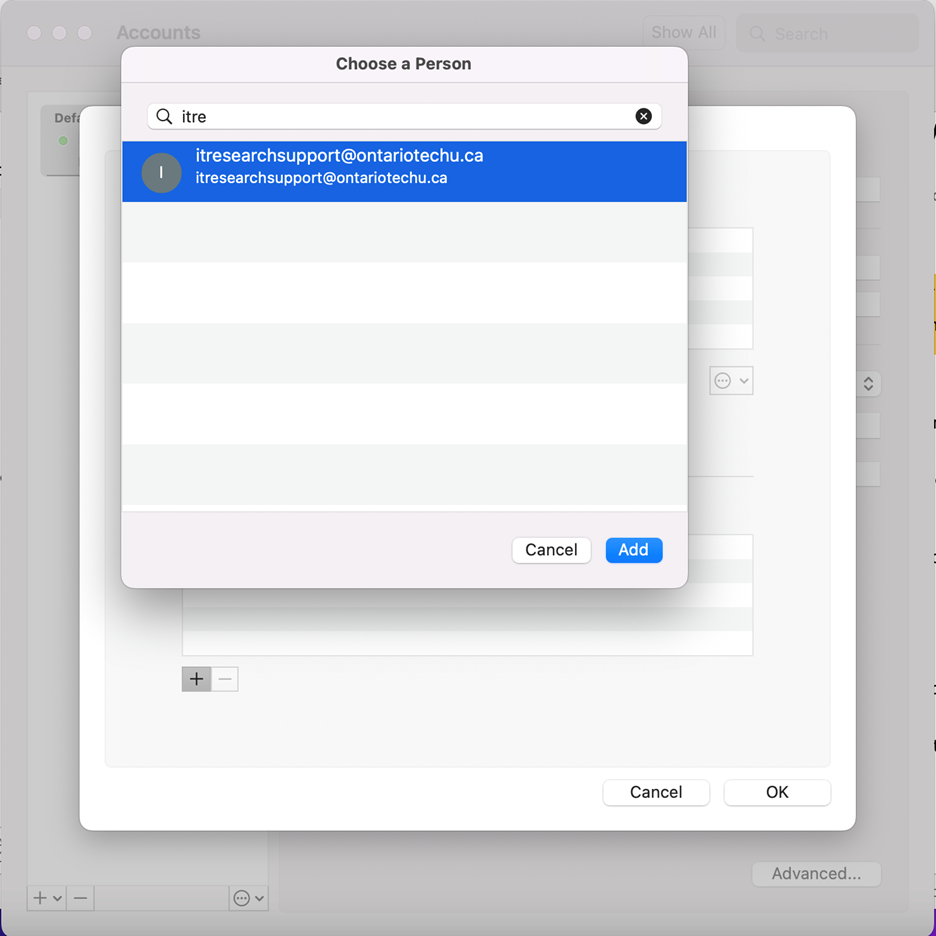
Step 6. Type in the name of the mailbox in the search box at the top, select the mailbox that appears in the list, and select the Add button, then select the OK button.
Step 7. Close the Accounts window. The shared mailbox will appear in the left sidebar after a little time, it may require additional time before all the folders and emails appear.