Microsoft Teams
Microsoft Teams is a collaboration tool for web-conferencing, group chat and file sharing. Everyone has access to 50GB of storage via Teams. If additional storage is required, please contact Ask.IT@ontariotechu.ca.
Microsoft Teams can be used for:
- Chatting with your students
- Collaborating on documents
- Sharing files
- Holding meetings
Use the below instructions to access Microsoft Teams:
- Step 1: Download and install the Microsoft Teams client.
- Step 2: Log in to Teams with your @ontariotechu.ca or @OntarioTechU.Net email address.
- Step 3: You will be presented with a list of Teams that you are already a member of. If there are no Teams available you can still use the chat and meeting functionality within Teams.
To create a new Team select the New Team icon in the left toolbar of Teams and fill out the displayed form.
Is Microsoft Teams replacing any other systems used at Ontario Tech?
Microsoft Teams is not replacing the University LMS (Canvas, Kaltura or Google Meet), they are the standard for teaching and learning at Ontario Tech. There are no plans in the short term to extend the pilot and/or further use of Microsoft Teams.
Can I use Microsoft Teams for classroom instruction?
In order to streamline the student experience, Microsoft Teams should not be used for classroom instruction. Instead, please use the standard supported tools - Canvas, Kaltura, and Google Meet.
How do I use Teams?
Select the feature in Teams that you'd like to learn more about.
-
Channels
Channels are where you communicate with everyone in your Team and share files. Every Team comes with a General channel that cannot be removed.
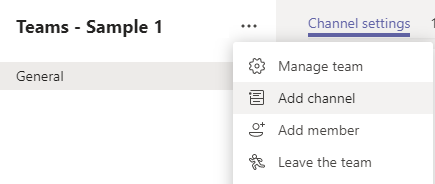
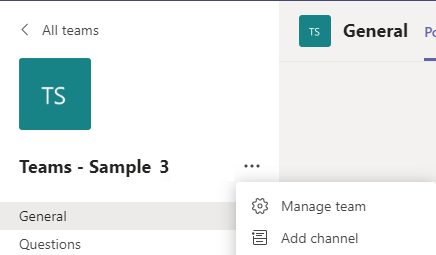
If you are the owner of the Team you can add an additional channel by clicking the three dots beside your team and clicking Add channel. Channels can either be set as Standard privacy and be accessible to everyone in the team or Private and limited to certain members.
For more information visit the Microsoft website.
-
Files
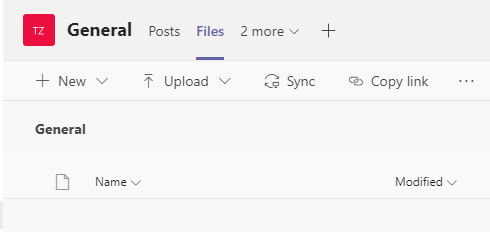
You can upload files to your Team for everyone in the team to access.
From the General channel click the Files tab and then add some files.
For more information visit the Microsoft website.
-
Meetings
Teams can be used to host meetings. Meetings can be created from within a Team, within a Chat, or via Outlook.
To start a meeting in a Team select the Channel you wish to post the Meeting in, click the video camera icon and select Meet now.
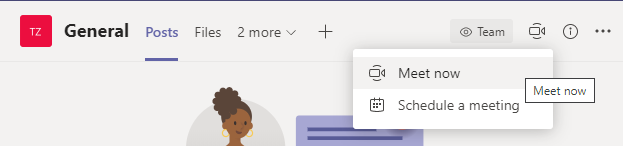
A link to the Meeting will be posted in the Channel automatically.
To start a meeting in a chat click the Video call or Audio call buttons within the Chat.
To schedule a meeting within Outlook, when creating a meeting select the Teams Meeting button to add Teams connection info to the meeting. If the button is not there, ensure you have installed and signed in to the Teams desktop application and then relaunch Outlook.
Functionality available within Meetings:
-
Noise suppression
Click the 3 dots, select Device Settings, and under Noise suppression select an option. For more information visit the Microsoft website.
- Breakout rooms
Breakout rooms can be used to split up a meeting into smaller groups for collaboration and discussion. To create breakout rooms click the breakout rooms icon and then select the number of breakout rooms to create. For more information visit the Microsoft website.
- Sharing content
You can share your screen, a PowerPoint presentation, or a Whiteboard by selecting the Share content icon and then selecting the file or screen you wish to present. For more information visit the Microsoft website.
- Background effects
You can blur your background or add a custom background image to your video by clicking the three dots and selecting Apply background effects. The Asset Library has a number of options for an Ontario Tech background. For more information visit the Microsoft website.
- Recording a meeting
Click the 3 dots and select Start recording. A red circle will appear in the top left of the screen. If you start a meeting from within a Team the meeting recording will be saved to the Documents tab in the Team. If you start a meeting from Outlook or a chat the meeting recording will be saved in the Recordings folder in your OneDrive. For more information visit the Microsoft website.
- Live captions
Click the 3 dots and select Turn on live captions. Teams will automatically detect what's said in the meeting and display captions at the bottom of the screen. For more information visit the Microsoft website.
- Meeting options
Click the 3 dots and select Meeting options. From here you can adjust meeting settings like who is allowed to join the meeting, who is allowed to present, and whether you must approve each person before they can join the meeting. For more information visit the Microsoft website.
- Participant controls
Click the Participants button to display a list of participants and then click the three dots in the Participants panel. From here you can mute all participants or download a list of attendees. You can also use the Participants panel to control who is focused in the meeting and to invite additional attendees. For more information visit the Microsoft website.
-
-
Chat
You can chat with people from within a Team or through private chat.
To chat within a Team, select the Channel you want to send the message in and click the New conversation button at the bottom of the Channel.
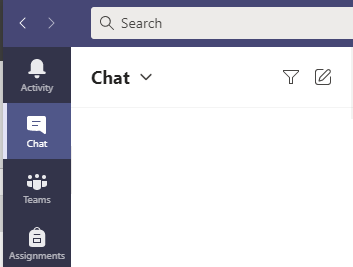
To start a private chat with an individual or a group click on the Chat tab and then clicking the pencil icon at the top.
For more information visit the Microsoft website.
-
Team management
To create a new Team select the New Team icon in the left toolbar of Teams and fill out the displayed form.

If you are the owner of a Team you can manage the who is part of the team by clicking the three dots beside your Team name and selecting Manage team.
Under the Members tab you can invite or remove people from the Team. Under the Settings tab you can add a picture to the Team or control what permission members have to add and remove content from the Team.
For more information visit the Microsoft website.