Ontario Tech acknowledges the lands and people of the Mississaugas of Scugog Island First Nation.

We are thankful to be welcome on these lands in friendship. The lands we are situated on are covered by the Williams Treaties and are the traditional territory of the Mississaugas, a branch of the greater Anishinaabeg Nation, including Algonquin, Ojibway, Odawa and Pottawatomi. These lands remain home to many Indigenous nations and peoples.

We acknowledge this land out of respect for the Indigenous nations who have cared for Turtle Island, also called North America, from before the arrival of settler peoples until this day. Most importantly, we acknowledge that the history of these lands has been tainted by poor treatment and a lack of friendship with the First Nations who call them home.

This history is something we are all affected by because we are all treaty people in Canada. We all have a shared history to reflect on, and each of us is affected by this history in different ways. Our past defines our present, but if we move forward as friends and allies, then it does not have to define our future.

Learn more about Indigenous Education and Cultural Services

Schedule a Google Meet using a computer

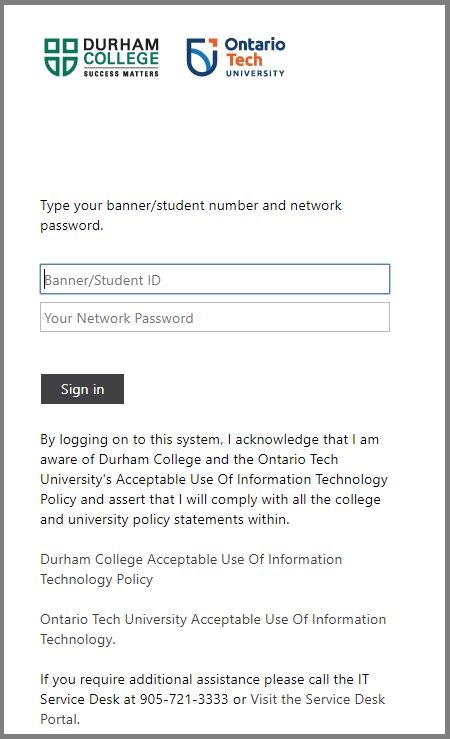
Step 1: Sign into OntarioTechU.Net account at mail.ontariotechu.net – with Banner # and Network password.

Login

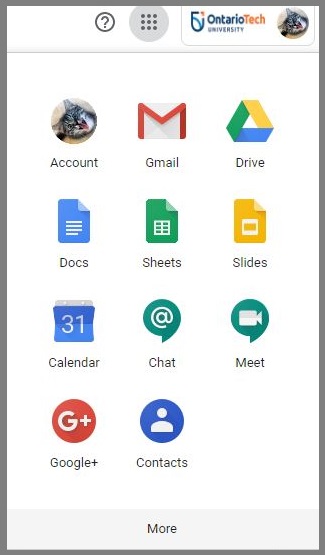
Step 2: Select the waffle tile.

Waffle

Step 3: Select Calendar icon.

Calendar

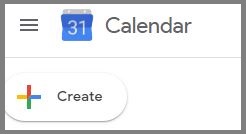
Step 4: Select the Create icon.

Create

Step 5: Select More options.

More Options

Step 6: Enter a meeting title, date, start and end time.

Meeting Info

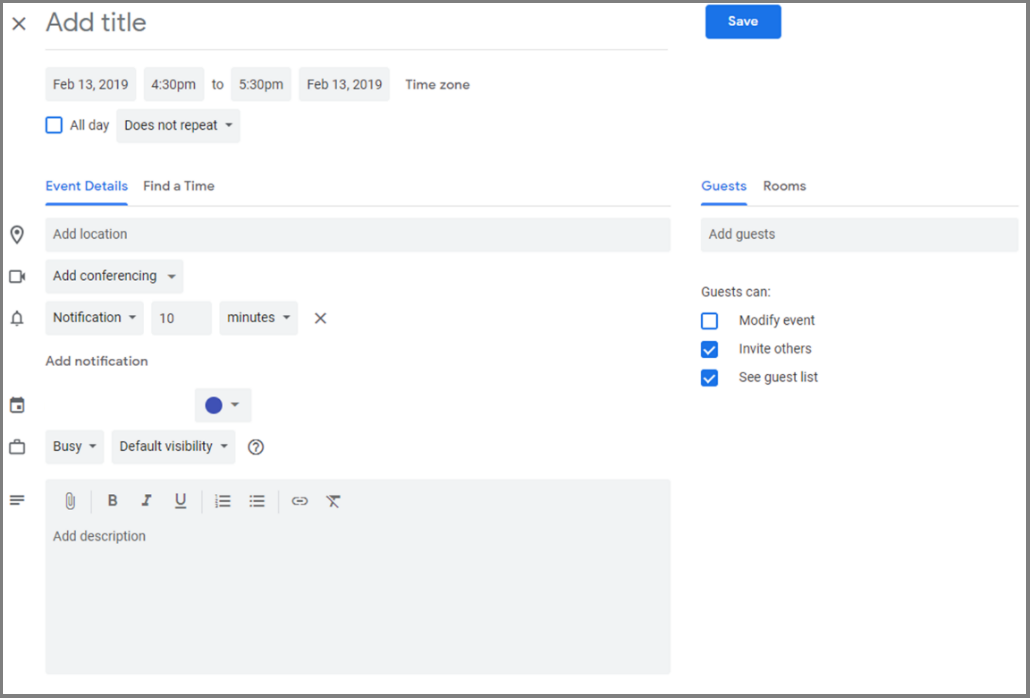
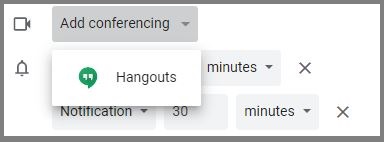
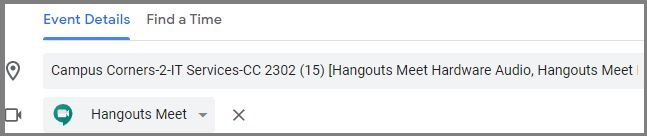
Step 7: Select Add conferencing and select Meet from the drop down.

Add Conferencing

Step 8: Select the paper clip icon to add an attachment (The file can only be seen via computer only).

Add Attachment

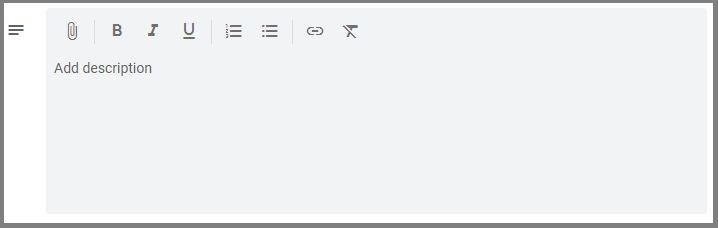
Please note: to add details about the meeting use the Add description box.

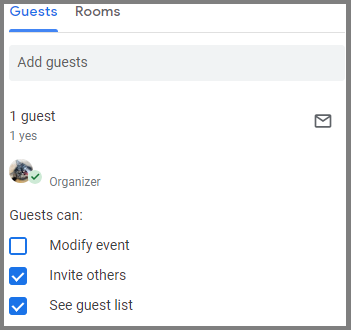
Step 9:  Select Guests to add participants to the meeting.

Add guests

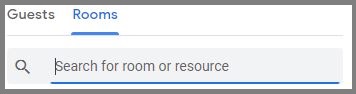
Step 10:  If using Google Meet hardware, follow the steps below, if not, please skip to Step 11.
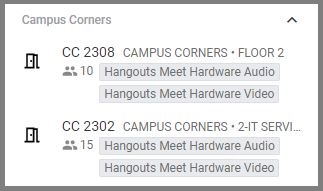
a) Select Rooms.

Add rooms

b) Select the building.

Add Building

c) Select the room number.

Add room number

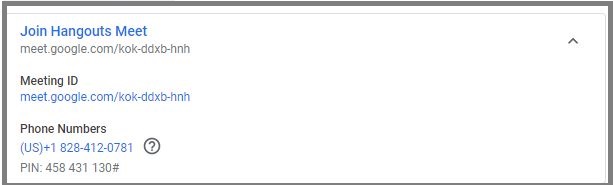
Step 11:  Select on Manage details to get Conferencing details and paste into an email to share to the participants.

Manage Details

Step 12:  Select and copy the Conferencing details and select Done.

Conferencing

Step 13:  Click Save to schedule meeting

 Save


FAQs Submit a ticket Ask a question Software help