Locked print setup using MacOS
Help protect printed documents and centralize printing to reduce your document security risks.
If you are printing sensitive information to a Ricoh network printer, you can use the Locked Print option to prevent the document from being printed until you are standing at the printer.
A password will be required to allow the print job to complete, ensuring that no one else picks up your document by mistake.
Typically, when a document is sent to the printer, it sits in the tray until someone picks it up. That means personally identifiable information (PII) may be circulated around the office, compromising security.
Ricoh Locked Print ensures that:
- Documents do not print until the authorized user at the printer releases them.
- Documents are not sitting in the tray, so another user cannot pick them up.
- Documents stored on the printer are encrypted.
Follow the instructions below to setup Locked Print on your Apple computer.
One-time setup at your Apple computer
Step 1: Open any Application that you normally print from. (i.e. In Word, select File - then select Print).
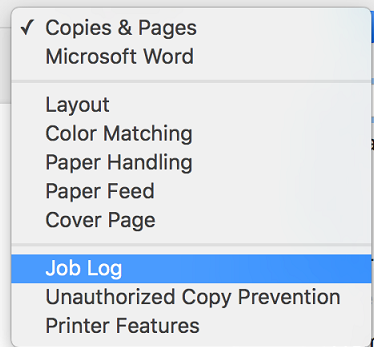
Step 2: Ensure that your departmental Ricoh network printer is selected, then select Copies and Pages.

STEP 3: Select Job Log.

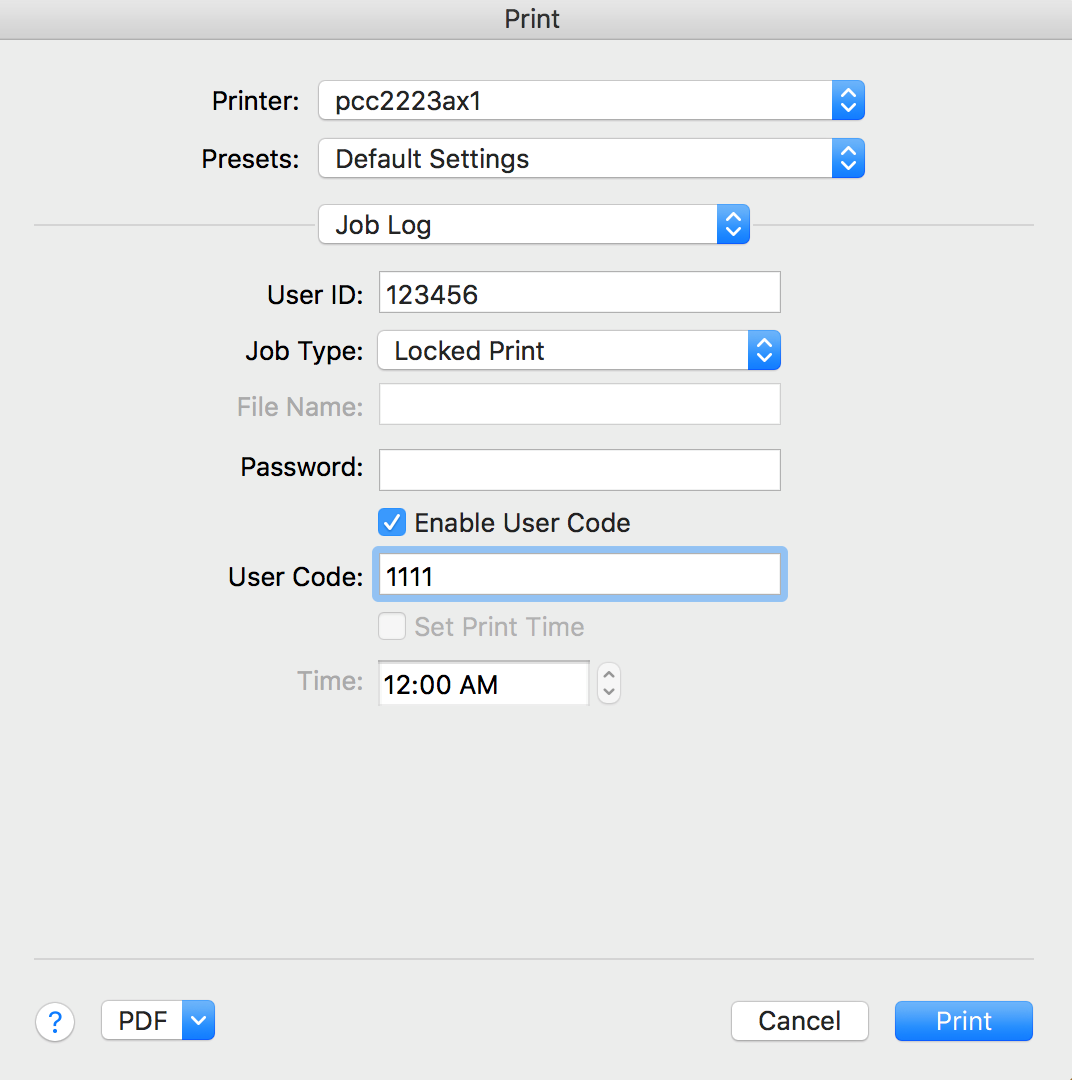
Step 4: Configure as noted below:
- User ID: enter the last six digits of your Banner ID.
- Job Type: select Locked Print
- Password: enter a numeric password (4 – 8 numeric characters)
- Check box: check Enable User Code
- User Code: re-enter the numeric password
- Select OK

Step 5: Select Presets, and then select Save Current Settings as Preset …

Step 6: Type in a name for your Preset, select All Printers, then select OK.

Step 7: Next time you go to print a document, ensure the preset you configured is selected before selecting print.